No-Bake Chocolate Vanilla Cream Dessert
Step-by-Step Instructions
Let’s embark on the culinary journey of creating this No-Bake Chocolate Vanilla Cream Dessert with the following step-by-step instructions:
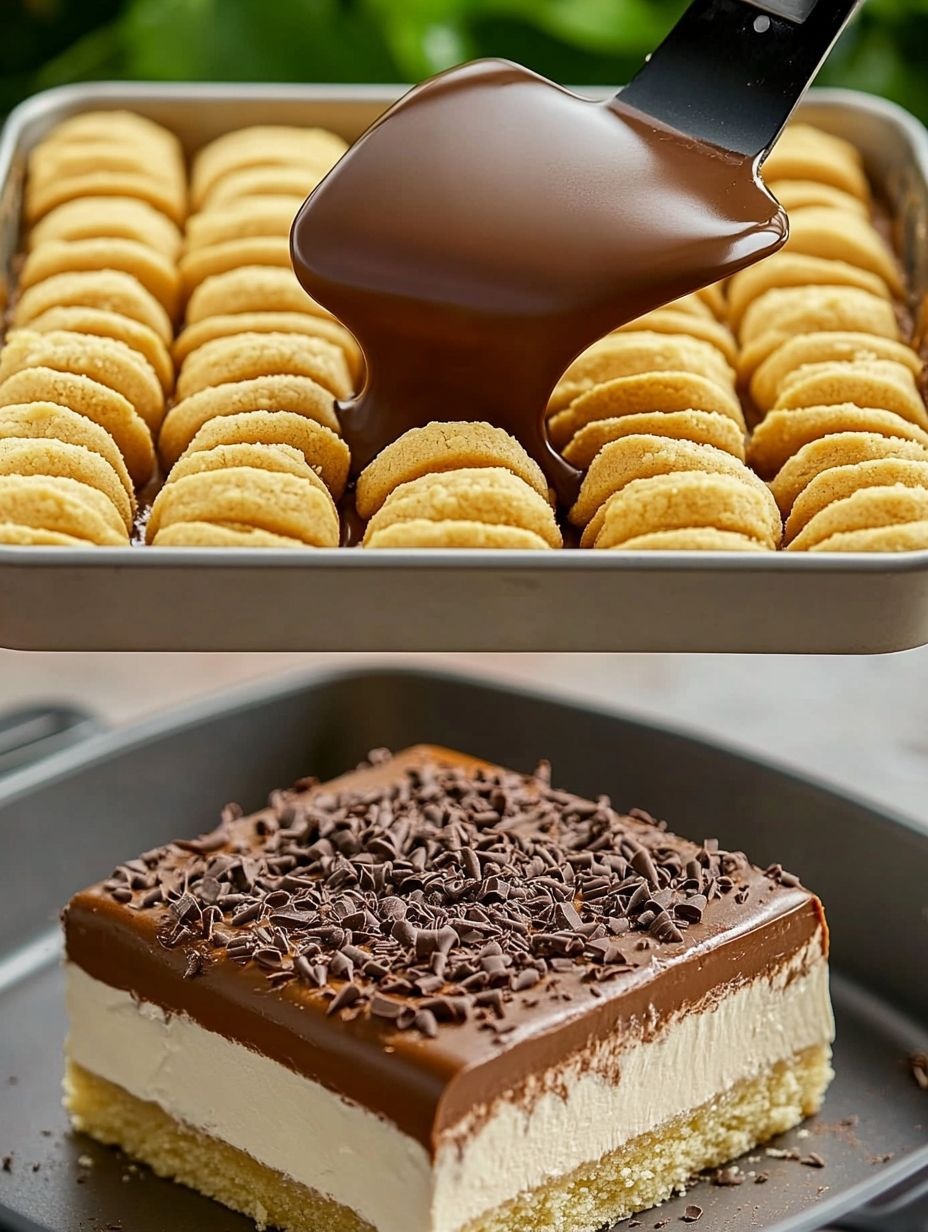
1. Prepare the Chocolate Layer:
In a bowl, mix the crushed chocolate cookies and melted butter until well combined. Press this mixture into the bottom of a springform pan to form the crust. Chill in the refrigerator while preparing the filling.
2. Make the Chocolate Filling:
In a saucepan, heat the heavy cream until it simmers. Remove from heat and add the chocolate chips, stirring until smooth. Mix in the vanilla extract, salt, and coffee (if using) until incorporated. Pour this mixture over the prepared crust and refrigerate until set.
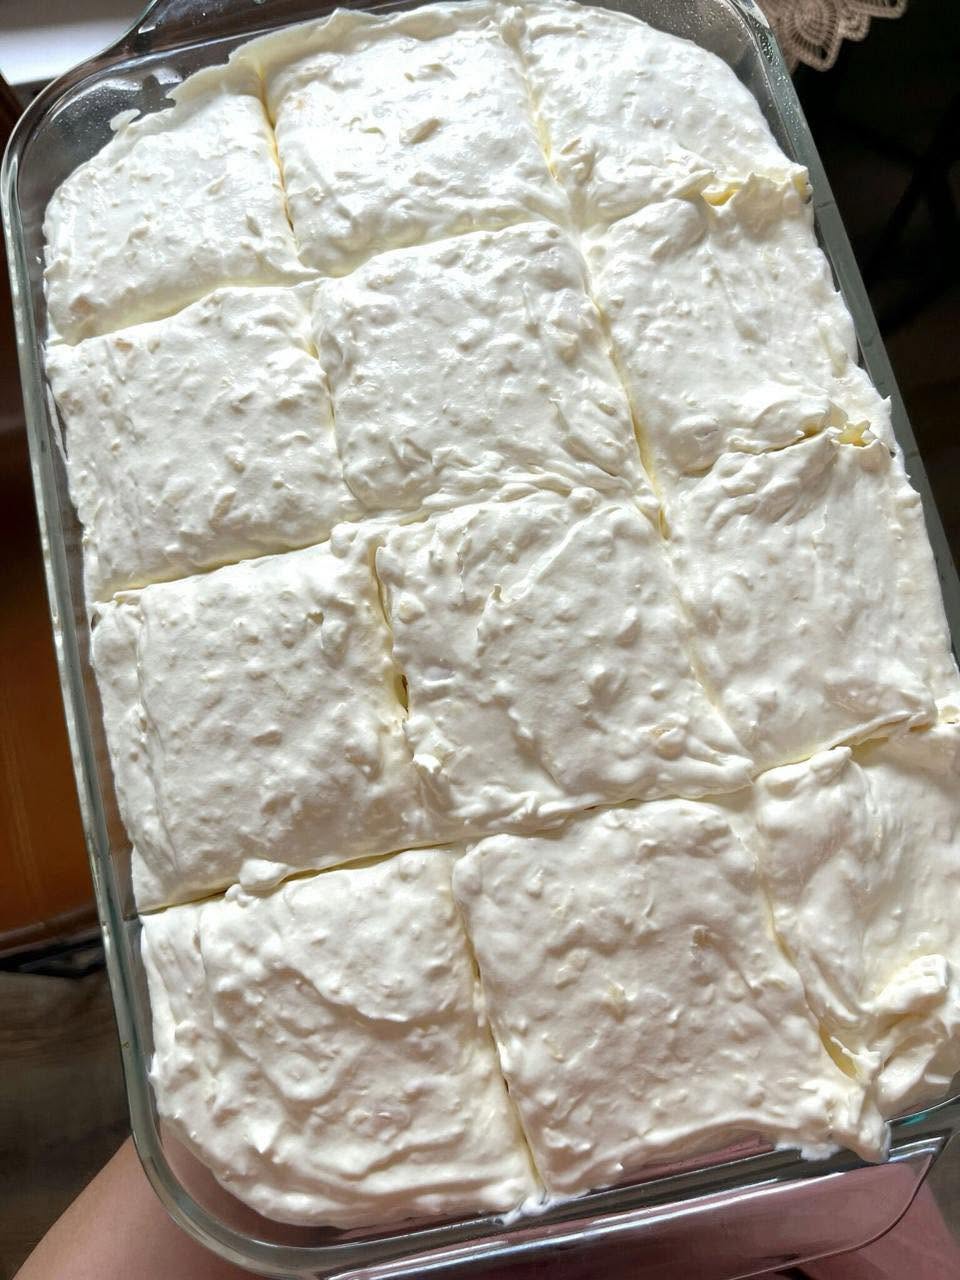
3. Whip up the Vanilla Cream:
In a mixing bowl, beat the heavy cream until stiff peaks form. In another bowl, combine the powdered sugar, vanilla extract, and softened cream cheese until smooth. Gently fold the whipped cream into the cream cheese mixture to create the vanilla cream layer.
4. Assemble the Layers:
Spread the vanilla cream over the set chocolate layer in the pan, smoothing it out evenly. Refrigerate the dessert for at least 4 hours or overnight to allow the flavors to meld and the layers to set.
Expert Tips for Success
. For the perfect No-Bake Chocolate Vanilla Cream Dessert, keep the following tips in mind:
– Use high-quality chocolate for a rich and indulgent flavor. – Ensure the cream cheese is softened to room temperature for a smooth and creamy texture. – Chill the dessert for the recommended time to allow the layers to set properly. – Experiment with different toppings such as caramel sauce or chopped nuts for added complexity. – Have fun and get creative with the presentation – garnish with fresh mint leaves or edible flowers for a touch of elegance.
Variations and Substitutions
. Feel free to customize this recipe to suit your taste preferences and dietary needs:
– Substitute the chocolate cookies with graham crackers or Oreo cookies for a different flavor profile. – Use dark chocolate for a more intense chocolatey taste. – Replace the heavy cream with coconut cream for a dairy-free version. – Add a layer of sliced bananas or strawberries between the chocolate and vanilla layers for a fruity twist. – Sprinkle crushed nuts or toffee bits on top for a crunchy contrast to the creamy layers.
Serving Suggestions
. To serve this No-Bake Chocolate Vanilla Cream Dessert in style, consider the following suggestions:
– Garnish each slice with fresh berries and a dusting of cocoa powder for an elegant finish. – Pair the dessert with a scoop of vanilla ice cream or a drizzle of chocolate sauce for an extra indulgent treat. – Serve chilled with a cup of hot coffee or a glass of dessert wine for a delightful sensory experience. – For a special occasion, decorate the dessert with edible gold leaf or chocolate curls for a touch of luxury.
FAQs
. Here are some common questions and answers about the No-Bake Chocolate Vanilla Cream Dessert:
Q: Can I make this dessert ahead of time?
A: Yes, you can prepare this dessert a day in advance and store it in the refrigerator until ready to serve. Just make sure to cover it to prevent any odors from affecting the flavors.
Q: Can I freeze this dessert?
A: While this dessert is best enjoyed fresh, you can freeze it for up to a month. Thaw it in the refrigerator overnight before serving for the best texture.
Q: Can I omit the cream cheese from the recipe?
A: The cream cheese adds a tangy richness to the vanilla cream layer, but you can omit it if necessary. Increase the amount of whipped cream to compensate for the volume.
Final Thoughts
As you reach the end of this culinary journey, you have unlocked the secrets to creating a mesmerizing dessert that combines the timeless allure of chocolate with the delicate charm of vanilla. The No-Bake Chocolate Vanilla Cream Dessert is more than just a recipe; it’s a testament to the joys of indulgence and creativity in the kitchen.
Whether you savor a slice alone in quiet contemplation or share it with loved ones in a festive gathering, this dessert is sure to leave a lasting impression. So, roll up your sleeves, gather your ingredients, and embark on a culinary adventure that promises to delight and satisfy in equal measure. Bon appétit!


Post Comment